It’s just been over two weeks since our defect rectification exercise began with our submission of our first defect list, and we’ve added a few more defects to the list for the team to sort out. Fortunately, all fairly minor ones. Hopefully, the team will conclude their works in a week or so for us to do another joint inspection alongside our appointed designer, whereupon our real renovation project can begin.
Following through my earlier post on defects; here are more notes alongside pictures that new owners might want to especially watch out for.
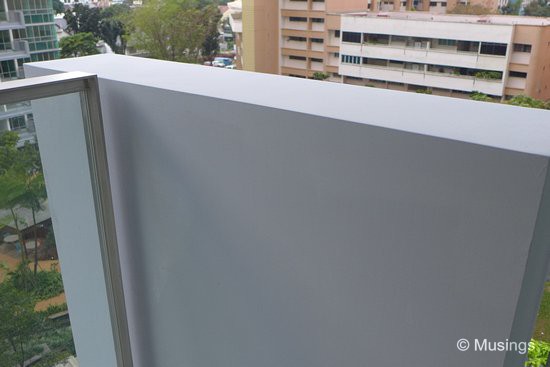
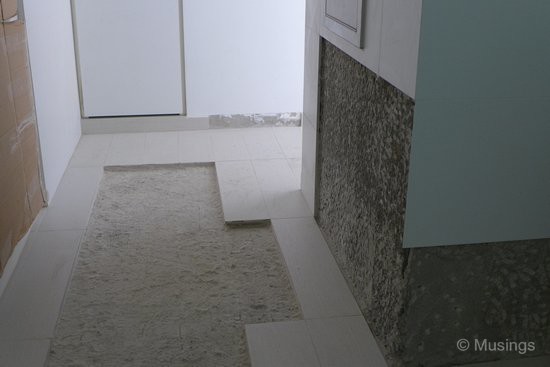
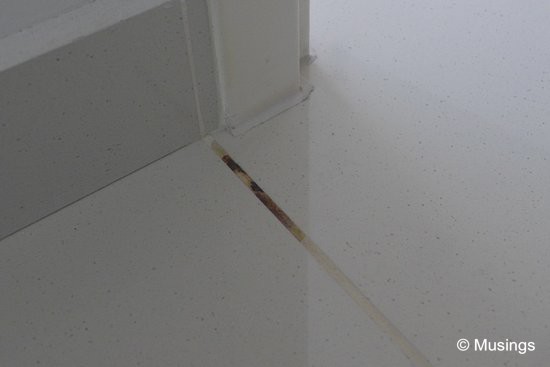
The above is the short side of our front balcony wall, made good. There were initially numerous and obvious chips and paint stains on the wall and also adjacent guard railing, but they’ve all been rectified since – they were in fact the first defects to be done up.Ongoing work in our kitchen above. The floor and wall tiles that were chipped in a few places have been removed, alongside the skirting on the far end of the picture.On the other hand; the groove in between two homogenous tiles just in front of one bedroom has been stained, pretty obviously. It looks easily removable (well, hopefully) but we will be continuing to monitor it and see if the defect team cleans it on their own initiative.
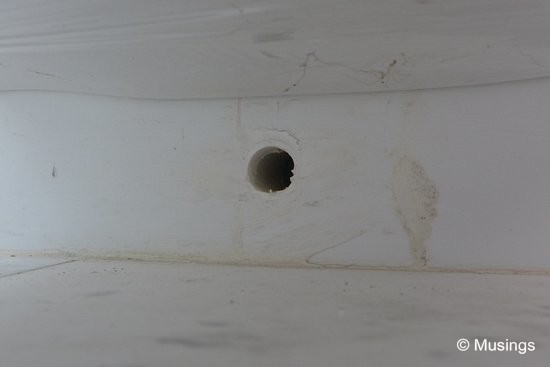
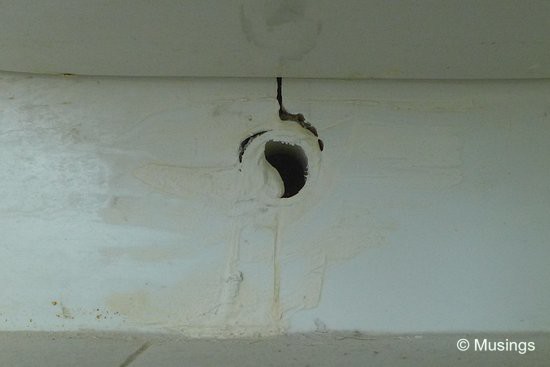
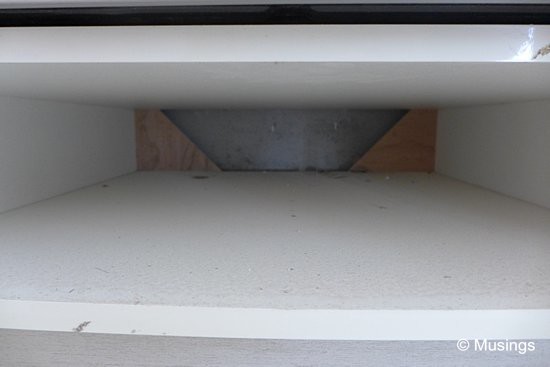
The next three pictures might be of concern to new residents checking their units:
This is the outlet that’s just directly below the cistern in the bedroom toilets. This picture here is for our master toilet cistern. While the area isn’t in the most pristine condition, the outlet should at least be unblocked.In comparison, here’s what the similar outlet for our guestroom toilet cistern looks like. It’s poorly done up, and looks like it’s partially blocked even. It’s easy enough to clear it up, so should also be added as a defect.This compartment is directly below the kitchen oven. It’s not permanently sealed shut; but one probably have to firstly open the cabinet doors on both sides of this shelf, then use a bit of force to pry the shelf’s cover open. A couple of residents have reported finding debris and all manner of yucky stuff in this hidden compartment. Ours is pretty alright, except for it being dusty. Not a big issue for oneself to clean it out if there’s rubbish there, but it can also be added for the defect team to sort it out.
More notes to come when I have something further to report.:)
4 thoughts on “Work-in-Progress – Part 45 – Defects (II)”
hi,
we are neighbours, my unit is block 10 too. i am looking for curtain and blinds too, mind to share your contact? hoping to save some money there.
regards
dennis
Replied.:)
Thankfully most of the defects are quite minor and I expect that for the most part they’re unavoidable given the scale of the project. However, was there ever a clear reason as to how at least a few of the defects came about or, more especially when considering the more obvious ones, why they were left in place?
Well bud, I’m speculating here, but given the sheer number of units in the project, I don’t think it’ll be unexpected for different subcontractor teams to be handling each aspect of the unit. Such as it is, the quality of workmanship from team to team, individual to individual, might differ then. Normally, I expect this sort of thing should be leveled off by the supervisors, or the unit inspectors (?) more observant when they checked the unit before indicating it’s Ok to begin transfer to owner. That’s as much as we’ve also been hearing from other owners – several were really asking how their units passed inspection! We saw some really serious defects in other units, which made us really wonder too. Thankfully, ours was mostly Ok.