There’s been a lot of stories of late about the kind of extreme photo-editing that some social media influencers have gone to to make themselves look far better than there really are. There are even YouTube channels devoted to calling out and exposing these influencers, like this channel for instance here. My interest isn’t so much in the possibly questionable ethics involved, but I was quite curious about the software tools available today that can really dramatically change the entire look for a picture.
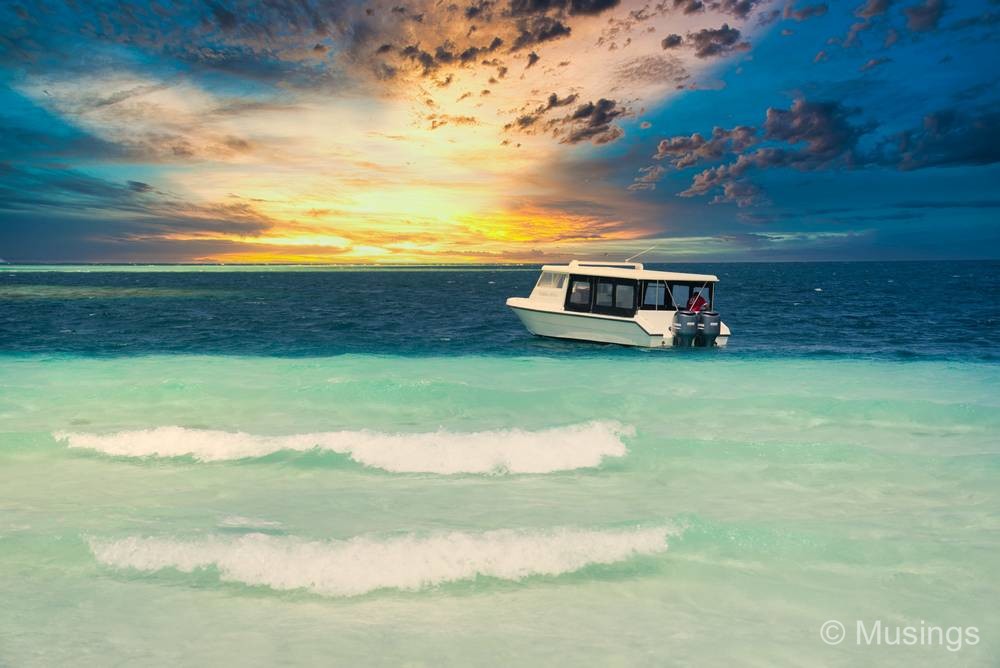
One such software too, albeit not without its share of controversy, is Luminar, the latest version of is being v4.1.0. The software doesn’t just do exposure level editing – stuff that I already normally do in Lightroom to improve contrast, fix white balance, correct exposure errors (e.g. the pictures taken in snowfall last December in Japan) – but it purports to use artificial intelligence to automate and streamline edits that are traditionally done manually. The most interesting and widely talked-about feature in the newest edition though is sky replacement. Yep – you can use software today to basically remove an entire sky layer and replace it with something else – and the software will do it for you seamlessly, and even fix many of the little tell-tale signs that pixel-peeping a photo will normally reveal.
I was quite intrigued by the software after running a trial version of it, so picked up one such license that I obtained after scouting for vendor discounts. Here’s a quick showcase of the sky replacement feature I was playing with in Luminar, and the reference photo I used was taken during our visit to the sand bank in Maldives last June, blogged here earlier too.


All this said, the dilemma is when one should use such. Frankly for myself, I don’t think I’d care to use Luminar sky replacements for most of the outdoor photos I take. It’s just too much work, and the intensive processing easily brings even my recent i7-equipped laptops to its knees. However, I might use it now and then if there are specific photos that I’d like to showcase e.g. akin to an art expression, but I’d also specifically also state the kind of adjustments I’ve done in Luminar too – on account that the amended picture doesn’t quite look like the actual scene at the point of taking the picture.
Recent comments