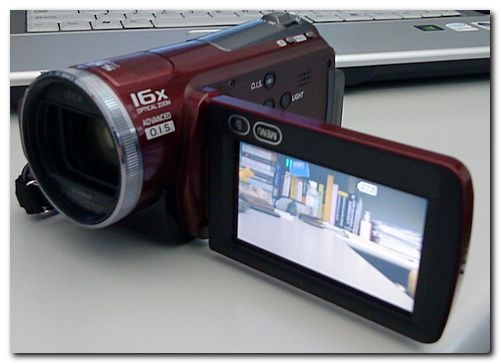
More notes.:)
 Navigation: The SD20 has a small number of buttons and levers for triggering the record, shutter for still images, zooming, the built-in LED video light, power-on/off, battery release etc.
But the rest of it is operated via a touch-screen menu that displays off the LCD. The touch screen isn’t quite as sensitive to touch as the Sony camcorder though. A couple of times I had to depress the an on-screen button a couple of times for it to register. Maybe that’s why the SD20 comes with a stylus too.
Battery: The package came with a normal capacity battery that can record for 50 minutes, and also the higher capacity battery for a recording time of twice that. I haven’t put either through a complete test yet. But both batteries are similarly sized, so I think the normal capacity one’s gonna be confined to the box.
Video format: The camcorder uses the MPEG4-AVC/H.264 codec, and supports video recording at four quality settings between1920x1080 and 1440×1080. At the highest quality setting, the 8 GB card can store just an hour of video, and at the lowest, 3 hours. I took a couple of videos at the highest quality, and and the notebook struggled a little to keep up. Storage isn’t much of a concern though. I typically bring along a notebook when we’re on vacations so that the video data files get transferred over to the notebook’s larger capacity hard drive.
Picture Quality: This is my first Full HD recorder, so I don’t have much of a reference point. However, a couple of things are certain. Based on the first couple of videos I’ve recorded, the images display a lot more resolution than off the mini-DV tapes I’ve used for the last 10 years. And that alone is worth the purchase of the product, especially considering that Full HD camcorders typically cost a lot more than the SGD1199 the SD20 cost. It doesn’t look as good as the images from a movie off a blu-ray disc for sure, but to get even near that kind of quality, I think one would need one of those professional series cameras, and a better video post-processing workflow.
Video post-processing workflow: One of the most nifty things about using mini-DV camcorders was that you could create DVDs off your recorded videos. I remembered creating one such video for Danyel’s birthday too like 5-6 years ago – I wonder if he still has it somewhere! However, DVD authoring from mini-DV is a heck of a lot of work. I had to grab the raw AVI files off the JVC and Sony camcorders, then re-render them into formats that the DVD authoring software could recognize. I typically had to spend 10-12 hours on one DVD authoring project. The whole process is pretty tedious, even on fast computers, so our Bali videos are still sitting on mini-DV tape in my drawer waiting for me to work on them.
While the DVD format is still a great standard and there aren’t many homes without a DVD player these days, increasingly large numbers of players and TVs can decode H.264 videos. Better still, our PS3 at home can play back these videos off the SD storage media just fine too without needing further conversion. So, unless I’m still intent on authoring the video files into an actual movie without transitions, titling, background music etc., the post-processing workflow now with the new camcorder is a lot simplified.
Ok, so why buy now and not later? Well, in part the HD camcorder was purchased with the San Francisco trip in mind later this week. And of course, to take videos of our coming daughter.:)
Recent comments