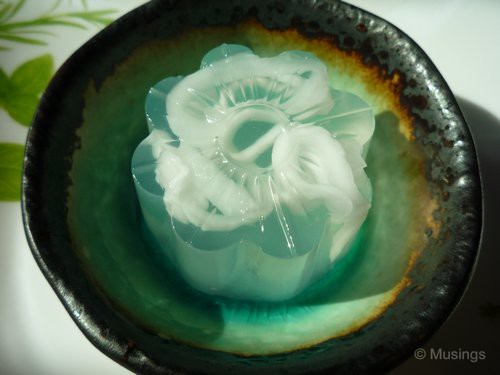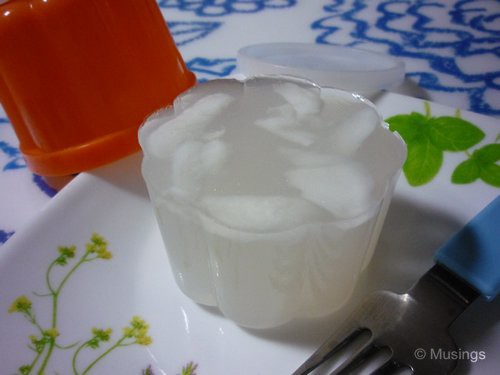

That’s right, I’m getting a kick out of making agar-agar and konnyaku jelly lately. :)
Hannah has been down with influenza and her fever has been raging over the past few days. Apart from the usual symptoms of fever, cough and runny nose, we have another challenge. Our girl drinks little water. As hydration is important in the case of overcoming fever, perhaps that explains why she is taking a longer time to recover.
Besides feeding her meals and fruits high in fluids, I also make jellies for her. And Hannah is starting to request for more agar-agar lately. I like to use fresh coconut water to make agar-agar and konnyaku jelly because: 1) Coconut water is cooling, 2) it contains useful mineral salts and other beneficial substances, and 3) it is fragrant and mildly sweet.
Preparation-wise is fairly straight forward if you have a cleaver/chopper to hack open a young coconut at its top to get to its water and flesh. Below is my preferred proportions of ingredients for making fresh coconut agar-agar and konnyaku jelly.

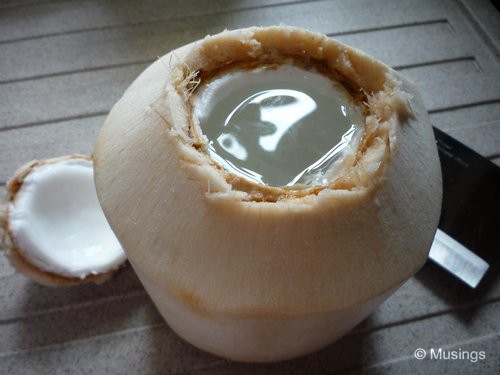
Okay, before you plunge into the recipes, you need to know how to get through the thick husk of the coconut to get to its contents. There are a few ways to open a coconut. It could be daunting and even scary for the first-timer but once you got the hang of it, subsequent attempts should be just routine. BTW, I use young coconuts which come in their fibrous outer layer.
Okay, this is how I open young coconuts. Use the heel of the cleaver knife to hack the top of the coconut (going in a circle) in as many times as necessary so that a circular opening is created. Use the blunt side of the cleaver to pry open and remove the top, pour out the coconut water into a big bowl first to catch any accidental drips before transferring it into a measuring cup, and spoon out the flesh into another bowl.
Fresh Coconut Konnyaku Jelly Recipe
Ingredients (for making 1 tray of 8 jellies)
- Coconut water from 1 small young coconut (Thai coconuts preferred for its fragrance) – about 250 ml
- Water – 50 ml (or any amount to add to the coconut water to make up to the total volume of 300 ml)
- Konnyaku powder – 4 g
- Sugar – 30 g
- Coconut flesh – scraped from the coconut with a spoon. Avoid the stiff flesh if any. Cut into thin strips.
Method
1) Divide the coconut flesh equally into the 8 jelly moulds of a tray.
2) Mix konnyaku powder and sugar in a bowl and set aside.
3) Place ingredient 1 and 2 in a pot and bring it to boil.
4) Lower the flame and add konnyaku-sugar mixture. Stir for about 3 minutes to dissolve powder and sugar.
5) Turn off the flame and stir for another 5 minutes to remove tiny bubbles in the mixture.
6) Pour the mixture into the moulds and set aside to cool down to room temperature. Place the tray of moulds into the refrigerator to chill further for 1-2 hours before serving. :)
Fresh Coconut Agar-Agar Recipe
Ingredients (for making 5 cups, 120 ml each)
- Coconut water from 1 big young coconut (Thailand ones are preferred for its fragrance) – about 500 ml
- Water – 100 ml (or any amount to add to the coconut water to make up the total volume of 600 ml)
- Sugar – 55 g (about 4 flat tbsp, or adjust accordingly if you use less or more water)
- Agar agar powder – 6 g (slightly less than 1 tbsp – I used Swallow Globe brand)
- Coconut flesh – scraped from the coconut with a spoon. Avoid the stiff flesh if any.
Method
1) Mix the first 4 ingredients in a pot and bring it to boil. Stir every now and then to ensure all ingredients are well incorporated while waiting for boiling to occur.
2) Once the mixture is boiling, add coconut flesh and bring it to boil again. Turn off the flame.
3) If you’re using plastic molds, let the agar agar mixture cool for a few minutes before pouring. If using metal molds, you could pour it out right away.
4) Allow the agar agar to cool down to room temperature before transferring it into the refrigerator to chill it down further (about 1-2 hours) to get a nice cooling dessert. Enjoy :)
Recent comments